Piling on more insulation won’t lower your heating bills if your home’s air barrier is breached.
- The “stack effect” actively sucks cold air into your home, bypassing thousands of dollars in insulation.
- Hidden gaps around recessed lights and attic hatches can be equivalent to leaving a window open all winter.
Recommendation: Stop focusing on R-value and start hunting for and sealing these critical air leaks to finally feel the difference.
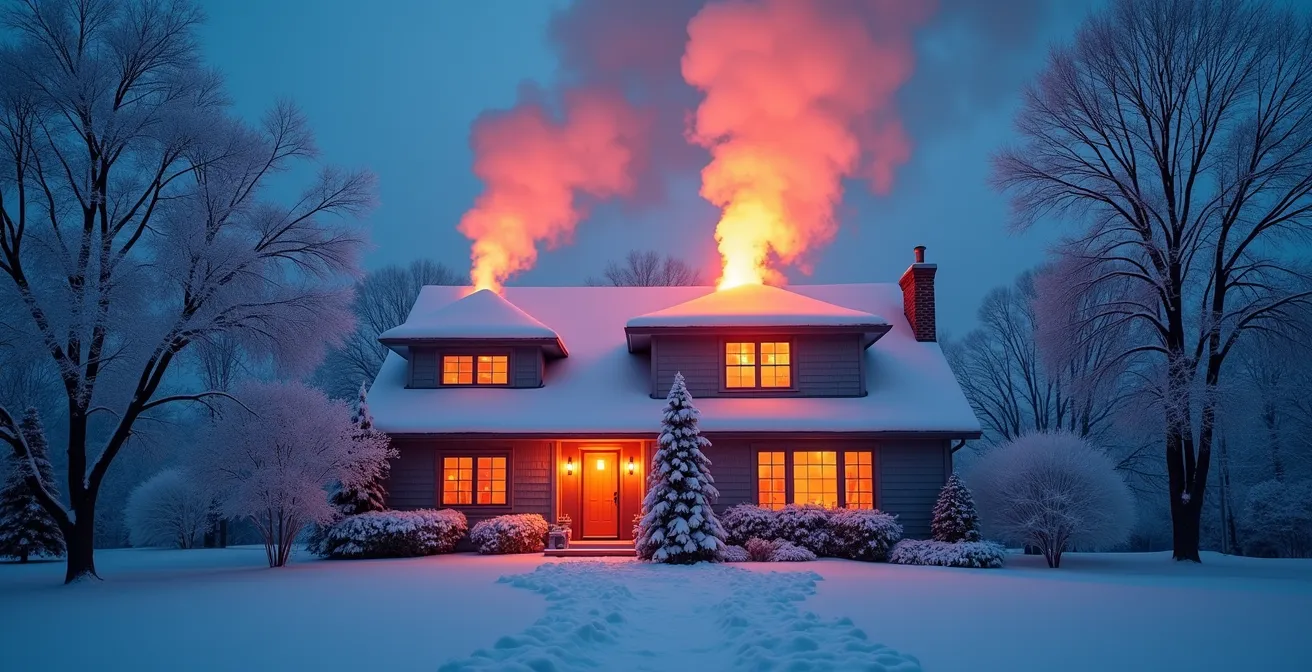
You did everything right. You invested in upgrading your attic insulation to R-60, a premium level that should have turned your home into a fortress against the Canadian winter. Yet, when the heating bill arrives, the number is stubbornly, frustratingly high. It feels like you’ve thrown your money into a black hole. You’re not imagining it, but the culprit isn’t what you think. While conventional wisdom points to windows, doors, or the furnace, the real saboteur is far more insidious.
The problem isn’t the *quality* of your insulation, but its effectiveness. Your R-60 insulation is like a thick wool sweater full of holes. It’s rendered almost useless by an invisible force: air leakage. This phenomenon, known as a thermal bypass, allows cold air to sneak around your expensive insulation, completely negating its benefits. Your home’s heating system is now fighting a losing battle, constantly trying to heat air that is being replaced by frigid drafts from unseen gaps.
But if the solution isn’t more insulation, what is it? The key lies in shifting your focus from R-value to airtightness. It’s about becoming an air leak hunter. This guide will reveal the most common and damaging hidden air leak pathways that undermine even the best insulation jobs. We will explore the physics that drives this infiltration, pinpoint the exact locations inspectors always check, and show you how to systematically seal your home’s pressure boundary, turning that porous sweater into a windbreaker and finally making your insulation work for you.
This article will guide you through the process of identifying and sealing the leaks that are secretly sabotaging your home’s energy efficiency. By understanding these key areas, you can take targeted action to reduce your heating costs and improve your comfort.
Summary: Uncovering Why Your R-60 Insulation Is Underperforming
- The Stack Effect: How Your House Acts Like a Chimney in Winter?
- Recessed Lights: The #1 Hidden Source of Heat Loss in Modern Homes
- Spray Foam or Caulk: How to Properly Seal the Basement Header?
- How to Weatherstrip Your Attic Hatch Like a Pro?
- Blower Door Test: Is It Worth $400 to Find Your Leaks?
- What Does a Blower Door Test Score of 3.5 ACH Mean for Your Home?
- The 5 Mandatory Air Barrier Details Inspectors Always Check
- Why Changing Windows Can Cause Mold if You Don’t Fix Ventilation?
The Stack Effect: How Your House Acts Like a Chimney in Winter?
The single most powerful force working against your heating bill is the stack effect. In winter, the warm, buoyant air inside your heated home rises, just like smoke in a chimney. As this air escapes through tiny, unseen holes in your attic and upper floors, it creates a negative pressure zone in the lower levels of your house, particularly the basement. This pressure difference acts like a vacuum, actively sucking cold outside air in through any available crack or gap in your foundation, rim joists, and lower walls. Your house literally becomes a giant, inefficient chimney.
The colder it gets outside, the stronger this effect becomes. During a Canadian cold snap, the pressure differential driving this air exchange can be significant. Building science research shows that a two-story house can experience over 4 pascals of pressure from the stack effect on a cold day. This constant flow of air is a thermal bypass on a massive scale; it doesn’t matter if you have R-60 insulation in the attic if the air it’s supposed to be trapping is constantly being replaced. This is why you can feel drafts in your basement even with all windows closed and why your furnace seems to run nonstop.
Fighting the stack effect is the first principle of air sealing. It requires a two-pronged attack: sealing the air leaks in the high parts of the house where warm air escapes (the “exhaust”) and sealing the low parts where cold air is drawn in (the “intake”). Without addressing both ends of the chimney, you are only solving half of the problem. The following sections will pinpoint exactly where these critical high and low leaks are most often found.
Recessed Lights: The #1 Hidden Source of Heat Loss in Modern Homes
Look up at your ceiling. If you have recessed lights, often called “pot lights,” you may be looking at the number one culprit for attic heat loss. Older, non-IC-rated (Insulation Contact) fixtures are essentially open holes into your attic. They create a direct chimney for your expensive warm air to escape, and because they are numerous, their cumulative effect is devastating. Each one acts as a mini-exhaust vent for the stack effect, continuously funnelling heat out of your living space 24/7.
The key distinction lies in the fixture’s rating. Modern IC-rated fixtures are designed to be safely buried in insulation. They are built as a sealed box, preventing air from passing through. In contrast, older non-IC-rated fixtures require a 3-inch clearance from insulation to prevent a fire hazard. This creates a significant uninsulated gap and a direct air leakage pathway. If you have a dozen of these on your top floor, you have the equivalent of a large, open vent bleeding heat directly into your attic.
This comparative table reveals why upgrading or sealing these fixtures is not just an energy-saving measure, but a critical safety requirement. The difference in fire risk and energy performance is stark.
| Feature | IC-Rated Fixtures | Non-IC Rated Fixtures |
|---|---|---|
| Insulation Contact | Safe for direct contact | 3-inch clearance required |
| Thermal Protection | Auto shut-off if overheating | No thermal protection |
| Fire Risk | Minimal when properly installed | High if insulation touches fixture |
| Energy Efficiency | Maintains insulation continuity | Creates uninsulated gaps |
| Installation Cost | Higher initial cost | Lower initial cost, higher energy loss |
Identifying what type you have is the first step. If you can see the bare bulb from below or feel a draft, you likely have an older, leaky fixture. Sealing them with purpose-built covers or replacing them with modern, sealed LED units is one of the most effective air-sealing investments you can make.
Spray Foam or Caulk: How to Properly Seal the Basement Header?
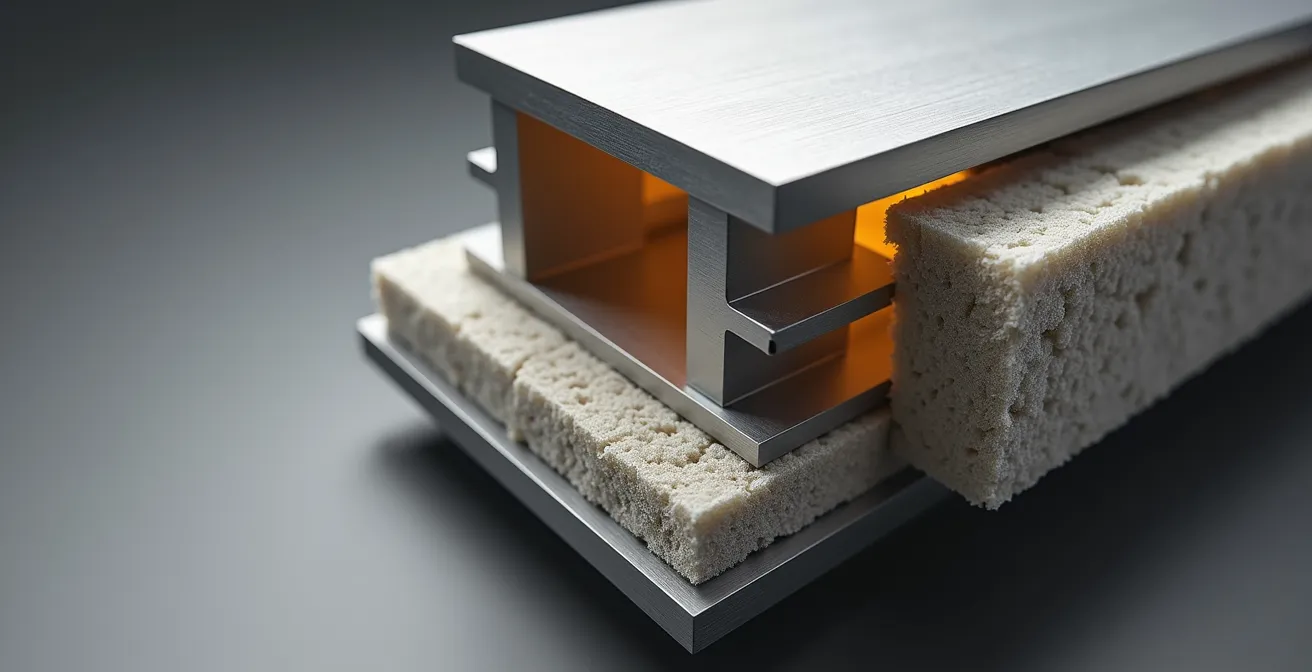
If recessed lights are the primary “exhaust” for the stack effect, the basement header area, or rim joist, is the primary “intake.” This is the wooden perimeter that sits on top of your concrete foundation. It’s an area riddled with joints, seams, and gaps where wood meets concrete and floor joists terminate. This is ground zero for cold air infiltration. According to Natural Resources Canada, basements can be responsible for up to 25 percent of a home’s total heat loss, and the rim joist is the main entry point for the cold air that feeds the stack effect.
Sealing this area effectively is non-negotiable for achieving true airtightness. The debate isn’t whether to seal it, but how. While caulk can fill small gaps, the professional standard for a robust, long-lasting seal involves a multi-step approach. The goal is to create a continuous air barrier and thermal barrier. Simply stuffing fiberglass batts into the cavities is a common mistake; fiberglass insulation stops heat transfer (conduction), but it does not stop air movement (convection).
A proper seal involves using a combination of materials. First, all seams and joints, especially the critical connection between the wooden sill plate and the concrete foundation, should be sealed with a high-quality, permanently flexible acoustic sealant. Then, pieces of rigid foam insulation (like XPS or EPS) are cut to fit snugly into each joist cavity. Finally, the edges of the rigid foam are sealed with canned spray foam to create a complete and monolithic air barrier. This “cut-and-cobble” method ensures that no air can pass through, turning the biggest air intake in your home into a sealed, insulated wall.
How to Weatherstrip Your Attic Hatch Like a Pro?
The attic hatch or pull-down stairs is another massive, and often completely overlooked, thermal bypass. It’s a large, uninsulated hole in your ceiling that directly connects your conditioned living space to the cold, unconditioned attic. Even if you have R-60 insulation everywhere else, a leaky attic hatch undermines it all. The impact is not trivial.
A poorly sealed attic hatch can be equivalent to having a 6-inch square hole in your ceiling operating 24/7 throughout the winter.
– Natural Resources Canada, Keeping The Heat In – Energy Efficiency Guide
Simply laying a piece of fiberglass insulation on top of the hatch is not a solution. The hatch needs to be treated like an exterior door: it must be both insulated and weather-stripped. A professional approach involves two key components. First, building a rigid foam “dam” or box around the attic opening. This dam should be taller than your R-60 insulation, preventing the loose-fill from spilling onto the hatch when it’s opened. Second, the hatch cover itself needs to be insulated by attaching layers of rigid foam board directly to its top side, aiming for a high R-value.

Finally, to create an airtight seal, high-quality compression weatherstripping (like EPDM rubber) must be installed on the top edge of the dam or the underside of the hatch trim. When the hatch is closed, it should compress this gasket, creating a perfect seal. Latches or clasps may be needed to pull the hatch tight and ensure consistent pressure on the seal. This turns a major liability into a fully sealed and insulated part of your ceiling’s air barrier.
Blower Door Test: Is It Worth $400 to Find Your Leaks?
How do you hunt for invisible leaks? While you can find major drafts with your hand or an incense stick, the only way to quantify your home’s overall leakiness and systematically find all the hidden pathways is with a professional blower door test. This test involves mounting a powerful fan in an exterior doorway, depressurizing the house to a standard pressure (50 Pascals), and measuring the volume of air that enters through all the cracks and gaps. The result is a precise, scientific measurement of your home’s airtightness, usually expressed in Air Changes per Hour (ACH).
Is it worth the typical $400-$600 cost in Canada? If you’re serious about solving your high heating bills, the answer is an unequivocal yes. The test moves you from guesswork to data. It provides a baseline score and allows the energy auditor to use diagnostic tools like smoke pencils or infrared cameras to pinpoint the exact location of your biggest leaks while the house is under pressure. This is forensic investigation for your home. Energy Star estimates show that 25% to 40% of residential energy usage can be attributed to air leakage, so a $400 investment to identify problems that cost you hundreds or thousands every year has a rapid payback.
Case Study: The Power of Targeted Sealing
An Ontario homeowner’s energy audit revealed an initial blower door test result of over 6 ACH, considered very leaky. The auditor used a smoke pencil to identify major leaks at the basement rim joist and around several unsealed recessed lights. After the homeowner spent a weekend and less than $100 on caulk and rigid foam to address only those specific spots, a re-test showed a score just under 3 ACH. They cut their home’s air leakage by more than half with minimal investment, reporting an immediate and dramatic improvement in comfort and a significant drop in their next heating bill.
The blower door test is not just a measurement; it’s a roadmap. It tells you where you are, shows you exactly where to go, and verifies your work when you’re done. For a homeowner who has already invested in R-60 insulation, it’s the logical next step to ensure that investment pays off.
What Does a Blower Door Test Score of 3.5 ACH Mean for Your Home?
Receiving a blower door test result of “3.5 ACH50” can feel abstract. What does that number actually mean for your comfort and your wallet? ACH50 stands for Air Changes per Hour at 50 Pascals. It tells you how many times the entire volume of air in your home is replaced by outside air in one hour when the house is depressurized to 50 Pascals (simulating a 20-mph wind blowing on all sides). While 3.5 ACH might sound low, the reality is sobering.
To put it in perspective, building performance experts use powerful analogies to make these numbers concrete. A score of 3.5 ACH isn’t a tiny, insignificant leak; it’s a major breach in your home’s air barrier.
For an average 2,200 sq. ft. home, a score of 3.5 ACH is like having a 20-inch x 20-inch window wide open, 24/7, all winter long.
– Building Performance Institute, Air Leakage Testing Standards
Imagine the impact of that open window on your heating bill. Your furnace is not just heating your home; it’s trying to heat the entire neighbourhood as cold air continuously pours in. A score of 3.5 ACH is common for older homes or even newer homes built before stringent airtightness standards were enforced. It signifies a home with significant thermal bypasses—likely at the rim joists, attic hatch, and through various ceiling penetrations. Getting this number down is the single most important goal of an air-sealing project. A “tight” home might score 1.5 ACH or less, while a certified Passive House aims for an incredibly low 0.6 ACH.
Understanding your score gives you a tangible target. It transforms the vague goal of “reducing drafts” into a measurable mission: to find and seal the equivalent of that 20×20 inch hole in your building envelope.
The 5 Mandatory Air Barrier Details Inspectors Always Check
When builders and energy auditors aim for a specific airtightness target, they aren’t sealing random cracks. They focus on a set of critical junctions where the home’s continuous air barrier is most likely to fail. A complete air barrier is a key requirement in modern building codes. For instance, to meet current energy efficiency standards, Vancouver’s building by-law mandates a maximum of 2.5 ACH for new construction. Achieving such a target requires meticulous attention to detail at specific points.
These five details are the first places an inspector will look, because they represent the weakest links in a typical home’s construction. For a homeowner hunting for leaks, this list is your treasure map, leading you directly to the most impactful areas to seal.
Checklist: Key Air Barrier Details for Inspection
- Foundation to Wall Continuity: Check for a continuous seal at the sill plate and rim joist. This is the junction where the wooden structure of the house sits on the concrete foundation and is a primary source of air intake.
- Sealing Around All Penetrations: Inspect every pipe, wire, and duct that passes through a wall or ceiling. Plumbing stacks, electrical conduits, and HVAC lines create holes that must be sealed with appropriate caulk, foam, or gaskets.
- Window and Door Frame Tie-ins: Verify that the home’s air barrier membrane is properly connected and sealed to every window and door frame. Gaps here are a common source of major drafts.
- Recessed Light Enclosures: Confirm that all recessed fixtures penetrating the ceiling are either IC-rated and airtight, or have been enclosed in a sealed box from the attic side.
- Ceiling-to-Wall Top Plate Continuity: Ensure the air barrier extends across the top plates of interior and exterior walls. This junction, often hidden by drywall, is a major pathway for warm air to escape into the attic.
By systematically inspecting and sealing these five mandatory details, you are not just patching holes—you are restoring the integrity of your home’s primary defense against air leakage. This is the professional approach that separates random draft-proofing from a strategic building performance upgrade.
Key Takeaways
- Your R-60 insulation is only effective if your home’s air barrier is continuous and intact.
- The stack effect is a powerful force that actively pulls cold air into your home, bypassing insulation.
- Targeted air sealing of a few critical areas (rim joist, attic hatch, recessed lights) provides a much higher return on investment than adding more insulation to a leaky house.
Why Changing Windows Can Cause Mold if You Don’t Fix Ventilation?
As you progress on your air-sealing journey, you enter a new phase of building science where a “tighter” house is not always a “healthier” house without one final piece of the puzzle: ventilation. It seems counter-intuitive, but making your home too airtight can lead to moisture problems and mold. Older, leaky homes had a crude but effective form of ventilation—drafts. They constantly exchanged stale, moist indoor air for fresh, dry outdoor air. When you seal those leaks and install high-performance windows, you trap moisture inside.
This trapped moisture, generated from cooking, showering, and even breathing, will find the coldest surfaces in your home to condense on. This is often in hidden places like the back of a closet on an exterior wall or in poorly insulated wall corners. This is where mold begins to grow. A case study reported by Fine Homebuilding highlights this exact problem, where a home retrofitted to an extremely tight 0.4 ACH experienced significant moisture accumulation and mold growth until a ventilation system was installed.

The solution is not to stop air sealing, but to introduce balanced mechanical ventilation. A Heat Recovery Ventilator (HRV) or Energy Recovery Ventilator (ERV) is a device that continuously exhausts stale, humid air while bringing in fresh air from outside. Crucially, it transfers the heat from the outgoing air to the incoming air, so you get fresh air without a significant energy penalty. This is the modern, engineered solution to the problem that drafts used to solve accidentally.
As you successfully tighten your home to below 3.0 ACH, you must begin to think about ventilation. An HRV system ensures you can have both exceptional energy efficiency and excellent indoor air quality, preventing the mold and moisture issues that can arise in a tightly sealed home. It completes the system, allowing you to breathe easy in your comfortable, efficient, and healthy home.
By shifting your focus from simply adding R-value to strategically creating a continuous air barrier, you are addressing the root cause of your high heating bills. Taking the next step to have your home professionally tested is the fastest way to create a targeted action plan for making your home truly energy-efficient.