Stopping overhead noise requires more than just ‘acoustic’ tiles; it demands a complete ceiling system where every part works together.
- True sound blocking combines mass and absorption (high-density tiles, mineral wool insulation) with structural decoupling to stop vibrations.
- A well-designed system also provides major long-term savings on maintenance access and lighting energy, a crucial factor given Canadian electricity costs.
Recommendation: For blocking footfall noise, prioritize tiles with a high Ceiling Attenuation Class (CAC) rating (>35) and combine them with unfaced mineral wool insulation and, for best results, resilient channels.
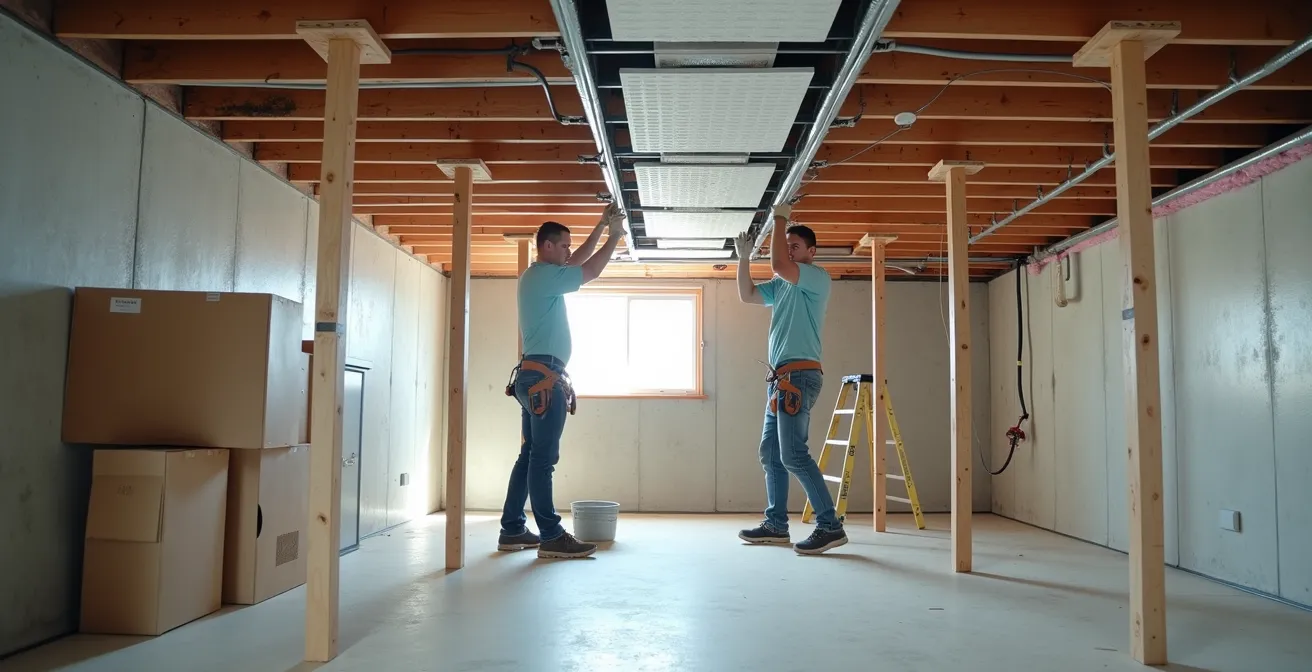
Anyone who’s worked in a basement office or a ground-floor commercial space understands the persistent disruption of footfall from above. The constant thud, click, and shuffle of footsteps overhead isn’t just an annoyance; it’s a productivity killer and a destroyer of peace. The common reflex is to search for “soundproof ceiling tiles,” assuming a single product can solve the problem. While manufacturers offer a wide array of tiles with impressive acoustic ratings, this product-focused approach often leads to disappointment.
The reality is that effective acoustic management is a game of physics. Noise from above comes in two forms: airborne (voices, music) and impact (footsteps, dropped objects). Standard acoustic tiles are good at absorbing airborne noise *within* a room, but they are often insufficient at blocking the low-frequency vibrations of impact noise passing *through* the structure. The secret to true silence lies not in a single tile, but in a holistic systems-based approach. This means viewing the ceiling as a complete performance envelope, where the grid, the tile material, the insulation, and the method of attachment all play a critical role.
This guide moves beyond generic advice to provide an architectural acoustician’s perspective. We will deconstruct the suspended ceiling into its core components and analyze how each one contributes to not just acoustic control, but also to lighting efficiency, maintenance accessibility, and long-term value, all within a specific Canadian context. We’ll explore why the right insulation is a matter of fire safety, how tile choice impacts your energy bills, and which materials withstand the unique challenges of a Canadian basement.
Summary: A Complete Guide to Noise-Blocking Suspended Ceilings
- Can You Put Batt Insulation Directly on Top of Suspended Ceiling Tiles?
- How High-LR (Light Reflectance) Tiles Save Money on Office Lighting?
- Why Standard Tiles Sag in Basements and What to Use Instead?
- The Drop Ceiling Advantage: Why Accessibility Beats Drywall for Maintenance?
- Beyond the “Office Look”: Modern Suspended Ceilings for Residential Basements
- Resilient Channels or Extra Drywall: Which Stops Bass Frequencies Better?
- LED Retrofits: How Lowering Heat Load Impacts HVAC Sizing?
- How to Soundproof a Home Office Against Street Noise for Under $1,000?
Can You Put Batt Insulation Directly on Top of Suspended Ceiling Tiles?
The intuitive answer for boosting soundproofing is to add mass, and laying batt insulation on top of ceiling tiles seems like an easy win. However, this simple action carries significant risks if not done correctly, especially concerning fire safety. You cannot use just any insulation. Standard paper-faced or kraft-faced batts, common for wall cavities, are a major fire hazard in a ceiling plenum. The paper facing is combustible and can violate critical safety regulations.
The only acceptable material is unfaced insulation, typically mineral wool or fiberglass batts. Mineral wool is often preferred for acoustic applications due to its higher density, which is more effective at blocking sound transmission. More importantly, it has a much higher melting point than fiberglass, providing superior fire resistance. This isn’t just a best practice; it’s a legal requirement. The National Building Code of Canada (NBCC) has strict rules governing fire spread in concealed spaces. As an example, a review of National Building Code of Canada requirements highlights how rules 2-126, 2-128, and others govern materials and methods to prevent the rapid spread of fire through plenums, which is exactly the space above a suspended ceiling.
Another critical consideration is weight. Insulation, especially high-density mineral wool, is heavy. A standard suspended grid is not designed to support unlimited weight. Overloading the grid by laying thick, heavy batts directly on the tiles can cause the T-bars to bend and fail over time. The proper method is to lay the batts across the T-bar grid members, not directly on the tile panels themselves, and to always verify the grid’s load-bearing capacity.
Your Action Plan: Safe Suspended Ceiling & Insulation Installation
- Grid Integrity Check: Verify that the perimeter wall molding is perfectly level and that hanger wires are securely attached to the joists above, spaced no more than 4 feet apart.
- Component Verification: Ensure the main beams run perpendicular to the joists and that cross tees are correctly installed to form a rigid, square grid pattern.
- Insulation Selection: Choose only unfaced mineral wool or fiberglass insulation. Never use paper-faced or kraft-faced batts due to the significant fire risk in a ceiling plenum.
- Weight Load Calculation: Confirm that the total weight of your chosen insulation and tiles does not exceed the grid system’s specified load rating to prevent sagging and failure.
- Acoustic Panel Placement: After insulation is in place, drop the tiles into the grid, ensuring you’ve selected panels with the appropriate CAC/NRC ratings for your specific acoustic goals.
How High-LR (Light Reflectance) Tiles Save Money on Office Lighting?
While the primary goal might be acoustics, a suspended ceiling system is also a major component of a room’s lighting design. The surface of a ceiling tile acts as a massive reflector, and its properties can have a direct and measurable impact on energy consumption. This is where the Light Reflectance (LR) value becomes a crucial metric for any office manager or commercial property owner in Canada.
A tile with a high LR value (typically 0.85 or higher, meaning it reflects 85% or more of the light that hits it) bounces more ambient and direct light back into the space. This creates a brighter, more evenly lit environment without needing to add more fixtures or use higher-wattage bulbs. The financial benefit is twofold. First, it directly reduces the electricity needed for lighting. Second, it can lower the initial capital cost of a new lighting installation, as fewer fixtures may be required to achieve the desired brightness (lux levels).
The savings are not trivial, especially in provinces with volatile energy markets. For instance, commercial Alberta electricity rates have shown significant volatility, swinging from highs of 29-33 cents per kWh to 11-13 cents. In such an environment, any passive efficiency gain provides a valuable buffer against price spikes. For a small business in Calgary, monthly electricity transmission charges alone can range from $73 to over $114. By maximizing light reflectance, you reduce overall consumption, which in turn lowers every component of your utility bill. Choosing a high-LR tile is a one-time decision that pays dividends for the life of the ceiling.
Why Standard Tiles Sag in Basements and What to Use Instead?
A Canadian basement is a unique environment, characterized by higher humidity levels and greater temperature fluctuations than the rest of the house. This presents a specific challenge for standard suspended ceiling tiles, which are often made from water-processed mineral fiber. These tiles are hygroscopic, meaning they readily absorb moisture from the air. When they become saturated with humidity, their structural integrity weakens, leading to the tell-tale sign of a failing ceiling: sagging.
A sagging tile is not just an aesthetic problem; it compromises the acoustic seal of the ceiling, allowing sound to leak through the gaps. It’s a common story for homeowners who invest in a basement renovation only to see their ceiling warp and droop within a few years. The solution is to move away from standard mineral fiber and choose a material designed for high-humidity applications. The two primary alternatives are:
- Fiberglass Tiles: These tiles are inherently resistant to moisture and will not sag, even in damp environments. They also have the added benefit of being naturally resistant to the growth of mold and mildew.
- Specially Treated “HumiGuard” Tiles: Many manufacturers offer premium lines of mineral fiber tiles that are treated with a proprietary coating to prevent moisture absorption and sagging.
This focus on material performance in specific environments reflects a broader trend in construction, where building codes are becoming increasingly stringent. As Canadian building standards continue to evolve, with many communities adopting codes that exceed provincial minimums, selecting materials with superior hygrothermal performance is becoming standard practice, not an upgrade.
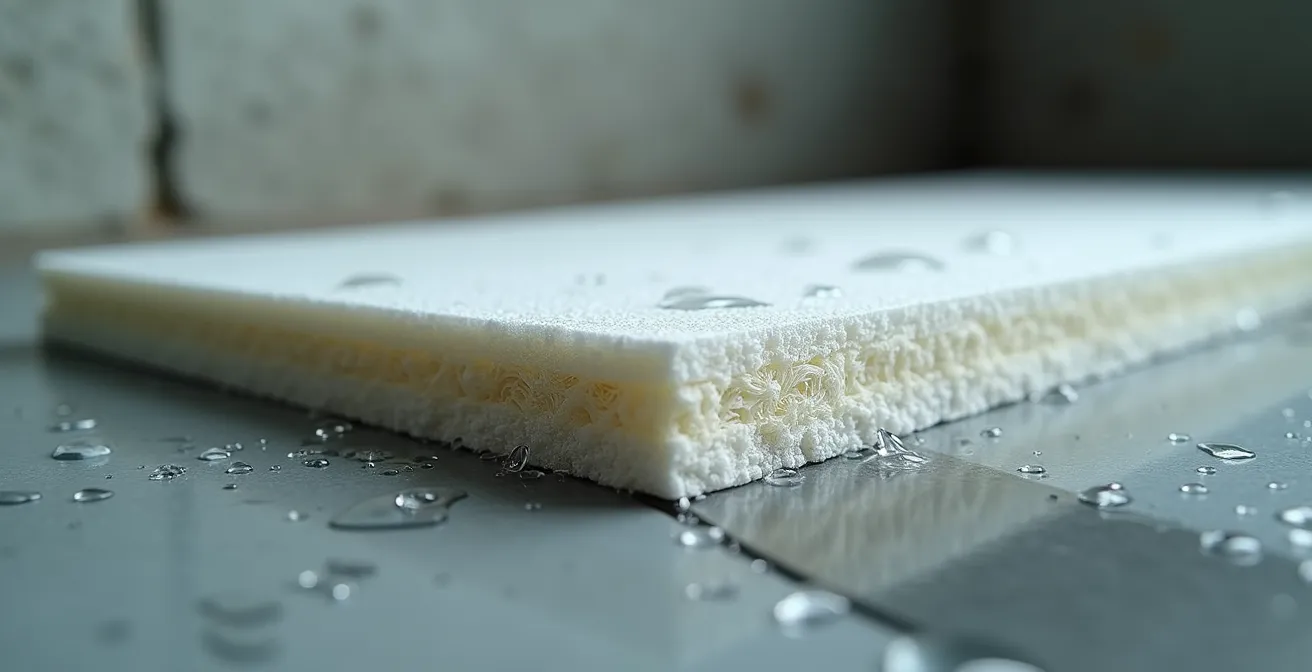
The image above clearly shows the dense, non-absorbent texture of a fiberglass-based tile, designed to repel the moisture typical in a below-grade space. For any basement project, choosing a moisture-resistant tile is non-negotiable for a long-lasting, high-performance ceiling system.
The Drop Ceiling Advantage: Why Accessibility Beats Drywall for Maintenance?
When finishing a basement or commercial space, the choice often comes down to a traditional drywall ceiling or a suspended grid system. While drywall offers a seamless, monolithic look, it creates a significant long-term “maintenance liability.” Any issue with plumbing, HVAC, or wiring concealed above the ceiling—a leaky pipe, a faulty junction box, or the need to run new data cables—becomes a major project. It involves cutting into the drywall, performing the repair, and then patching, mudding, sanding, and painting the ceiling. This process is messy, time-consuming, and expensive.
A suspended ceiling, by contrast, is built for accessibility. The entire ceiling plenum is accessible within minutes by simply lifting a tile. This turns a multi-day repair job into a minor task. For office managers, this means less operational downtime. For homeowners, it means avoiding costly professional repairs for simple issues. The ability to easily access and modify building systems is a massive, often underestimated, advantage.
This table illustrates the stark difference in effort and cost for common maintenance scenarios, based on data from leading manufacturers.
| Maintenance Task | Drop Ceiling | Drywall Ceiling | Time Difference |
|---|---|---|---|
| Access burst pipes | Remove 2-4 tiles (5 min) | Cut & patch drywall (2-3 days) | 95% faster |
| Electrical upgrades | Pop tiles, work, replace | Cut access, repair, paint | 1 day vs 3-4 days |
| HVAC inspection | Immediate access | Create access points | No damage vs repair needed |
| Smart home wiring | Weekend DIY project | Professional contractor needed | $0 vs $500-1500 |
As the comparative analysis from Armstrong Ceilings shows, the time and cost savings are dramatic across the board. The perceived aesthetic superiority of drywall often comes at a steep, hidden price. A modern suspended ceiling offers both sophisticated looks and unparalleled practicality, making it a smarter long-term investment for any space with active building systems.
Beyond the “Office Look”: Modern Suspended Ceilings for Residential Basements
The term “drop ceiling” often conjures images of drab, 2’x4′ institutional tiles under a glaring fluorescent light. This outdated perception is one of the biggest reasons homeowners hesitate to use them in residential spaces. However, the modern suspended ceiling market has evolved far beyond this “office look,” offering a vast range of styles, textures, and finishes that can complement any interior design, from rustic to contemporary.
For a residential basement, the goal is to create a space that feels warm, inviting, and fully integrated with the rest of the home. Today’s ceiling systems make this entirely achievable. Instead of being a purely functional element, the ceiling can become a key design feature. Some of the most popular options for Canadian homes include:
- Wood-Look Planks: These tiles mimic the appearance of real wood, perfect for creating a cozy, “Canadian cottage” or rustic rec room aesthetic without the weight and maintenance of actual wood.
- Coffered or Tin-Look Tiles: For heritage homes or more traditional designs, these tiles add architectural character and a sense of depth and history.
- Smooth, Minimalist Panels: Large format 24″ x 24″ or 24″ x 48″ panels with a smooth, flat finish create a clean, contemporary look that virtually disappears, especially when paired with a narrow-profile grid.
- Black Grid Systems: Pairing black tiles with a black grid is a popular choice for home theatres, creating a dark, non-reflective ceiling that enhances the viewing experience.
The cost for these aesthetic upgrades is also more accessible than many assume. According to manufacturer data, Armstrong acoustic ceiling tiles cost between $0.97/sq. ft. and $13.09/sq. ft. in Canada. This wide range means there is a solution for nearly every budget, from basic functional tiles to high-end designer looks. By combining these modern tiles with smart lighting choices like integrated slim LED pot lights, you can create a basement ceiling that is both beautiful and acoustically sound.
Resilient Channels or Extra Drywall: Which Stops Bass Frequencies Better?
When dealing with significant noise, especially the low-frequency thud of impact noise, simply adding mass is not enough. This is where the core principles of acoustics—mass, absorption, and decoupling—come into play. Adding an extra layer of 5/8″ drywall to a ceiling increases its mass, which helps block some airborne sound. However, it does little to stop the vibrations from footfalls that travel through the joists and into the drywall itself. To solve this, you need decoupling.
Decoupling means creating a physical separation between the ceiling joists and the finished ceiling. This is most commonly achieved with resilient channels (RC). These are thin metal strips designed in a “Z” shape that get screwed to the joists. The drywall is then screwed to the channel, not directly to the joists. The channel’s spring-like design allows the drywall to vibrate independently of the joist structure, effectively dissipating the vibrational energy from footfalls before it can be converted back into audible sound in the room below. This method is far superior for blocking low-frequency impact noise than simply adding more mass.

This structural separation is also what elevates a ceiling’s Ceiling Attenuation Class (CAC) rating. While NRC measures sound absorption *within* a room, CAC measures a ceiling’s ability to block sound from passing *through* into an adjacent room (or from the floor above). A CAC rating below 25 is considered poor performance, while a rating above 35 is considered high performance. An assembly using resilient channels, double drywall with damping compound, and high-density insulation can achieve exceptional CAC ratings, effectively isolating the space from overhead noise.
LED Retrofits: How Lowering Heat Load Impacts HVAC Sizing?
The benefits of a well-designed ceiling system extend beyond acoustics and aesthetics, directly influencing other building systems like HVAC. In a commercial office setting, lighting is a significant source of heat. Older fluorescent troffers are notoriously inefficient, converting a large portion of their energy into heat rather than light. This excess heat, known as heat load, must be removed by the building’s air conditioning system, increasing HVAC runtime and energy costs.
Retrofitting to modern LED panel lights, which can be integrated seamlessly into a suspended ceiling grid, dramatically reduces this heat load. LEDs are far more efficient, producing the same amount of light with significantly less energy and, consequently, less heat. This has a cascading effect on building performance. A lower heat load means the HVAC system doesn’t have to work as hard, leading to substantial energy savings, particularly during warmer months.
The following data highlights the direct impact of switching from fluorescent to LED fixtures.
| Fixture Type | Wattage | BTU/hr Heat Output | Annual kWh (3000 hrs) | Cost @ 12¢/kWh |
|---|---|---|---|---|
| T8 Fluorescent Troffer | 64W | 218 BTU/hr | 192 kWh | $23.04 |
| LED Panel Retrofit | 32W | 109 BTU/hr | 96 kWh | $11.52 |
| Heat Reduction | 50% | 50% | 50% | 50% savings |
As this comparison of heat output shows, a simple LED retrofit can cut the heat generated by lighting in half. For a new construction or major renovation, this reduction in the overall heat load can even allow for the installation of a smaller, less expensive HVAC unit, providing capital savings on top of the long-term operational savings. This is a perfect example of the integrated systems approach, where one smart decision (lighting) positively impacts another system (HVAC).
Key Takeaways
- Prioritize a high CAC rating (Ceiling Attenuation Class) over NRC for blocking noise from above.
- Always use unfaced mineral wool insulation for combined fire safety and acoustic mass, and verify your grid’s weight capacity.
- In basements, use fiberglass or specially treated moisture-resistant tiles to prevent sagging and mold.
How to Soundproof a Home Office Against Street Noise for Under $1,000?
While this guide focuses on overhead noise, the principles of soundproofing can be applied to create a quiet home office sanctuary against all types of intrusion, including street noise. The key is to apply the same systems-based thinking: identify the weakest points and apply a combination of mass, absorption, and decoupling. For a home office, the weakest points are typically the ceiling, walls, door, and windows. While a full solution might exceed $1,000, a highly effective, ceiling-focused strategy can be achieved within this budget.
As experts at Soundproof Cow note, “Acoustic ceiling tiles reduce airborne noise and improve the sound quality within a room by absorbing sound waves and eliminating echoes.” This addresses the absorption part of the equation. To tackle blocking and decoupling on a budget for your home office ceiling, a practical approach would be:
- High-CAC Acoustic Tiles ($300-400): Invest the largest portion of your budget in high-performance tiles with a CAC rating of 35 or higher for a standard-sized office.
- Unfaced Mineral Wool Insulation ($200-250): Add a layer of dense, unfaced mineral wool batts above the tiles for added mass and absorption.
- Acoustic Sealant ($50): Meticulously seal the perimeter of the ceiling grid where it meets the walls, as well as any penetrations for light fixtures or vents. Air gaps are sound leaks.
- Solid Core Door ($300+): While not part of the ceiling, if your budget allows, upgrading a hollow-core door is the next most effective step. If not, focus the full $1,000 on a superior ceiling assembly with resilient channels.
This targeted investment creates a robust barrier that not only absorbs sound within your office, making it a better space for calls and concentration, but also significantly blocks noise intrusion from above. It demonstrates that a strategic, focused approach can yield professional-level results without a professional-level budget.
By applying this systems-based approach—considering acoustics, safety, lighting, and maintenance together—you can design a suspended ceiling that solves your noise problem permanently and adds lasting value to your property. For a personalized assessment of your space and specific product recommendations, consulting with an acoustic or building professional is the logical next step.