Closed-cell polyurethane foam doesn’t just insulate; it engineers a monolithic composite structure, increasing wall racking strength by up to 300%.
- Success depends on controlling substrate thermodynamics, not just ambient temperature, a critical factor in Canadian climates.
- Proper surface preparation and material choice (next-generation HFO foams) are non-negotiable for long-term chemical bonding and structural integrity.
Recommendation: Treat SPF application as a precision engineering protocol, not a simple construction task, starting with a thorough structural and moisture assessment of the existing timber frame.
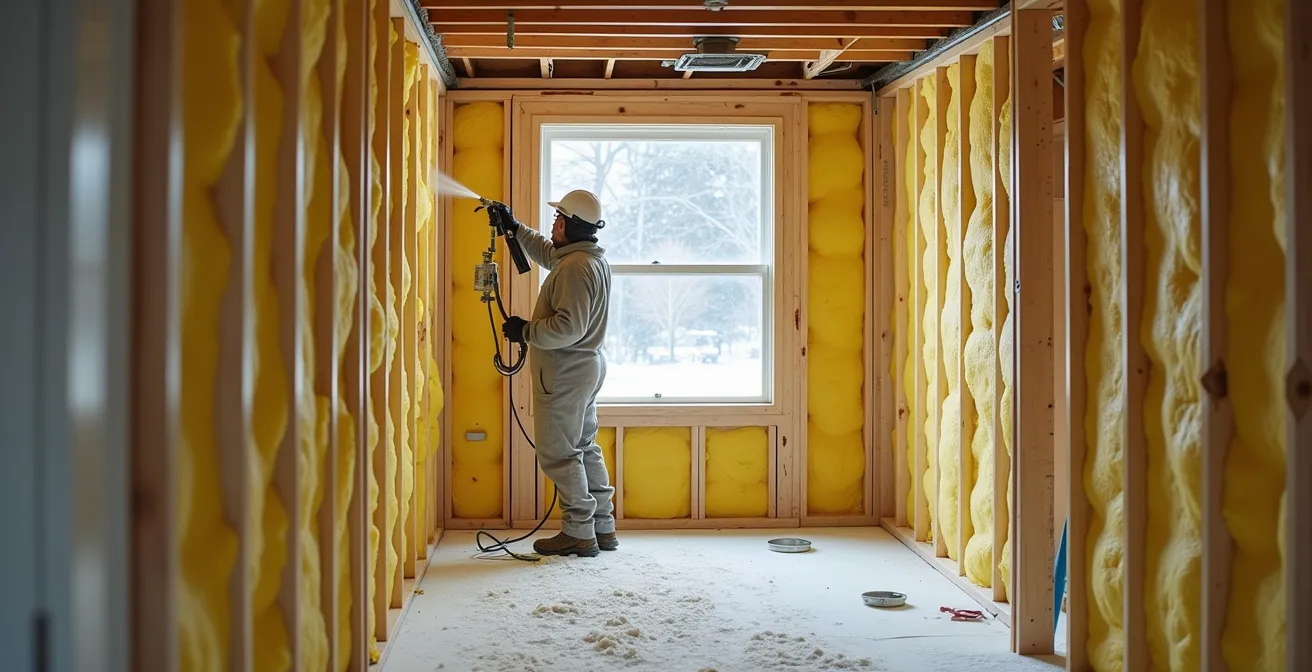
For restorers of Canada’s historic timber-frame buildings, encountering a wall that has lost its structural integrity is a familiar challenge. The immediate instinct often involves traditional reinforcement methods: sistering studs, adding blocking, or installing new sheathing. While effective, these solutions can be invasive, time-consuming, and fail to address the underlying issue of thermal performance and air leakage inherent in older construction. The conversation around spray polyurethane foam (SPF) often centres on its superior R-value, but this overlooks its most transformative property in restoration projects.
The common understanding of foam as a “strong glue” is a significant understatement. The true innovation lies in its ability to create a monolithic composite system. When correctly applied, closed-cell SPF doesn’t just stick to the wood; it chemically cross-links with the substrate and mechanically interlocks within the timber’s pores, effectively fusing disparate, aging components into a single, unified structural element. This process fundamentally changes how the wall assembly manages loads and stresses.
But what if the key to unlocking this structural potential isn’t in the foam itself, but in the precise control of the physics and chemistry during its application? This guide moves beyond the basics of insulation to explore the engineering principles that govern how polyurethane foam adds measurable rigidity to weakened walls. We will dissect the critical factors, from substrate thermodynamics in cold Canadian weather to material science, providing the technical framework needed to leverage foam as a true structural reinforcement tool.
This article provides a detailed engineering perspective on using polyurethane foam for structural reinforcement. Below is a summary of the key protocols and considerations we will cover to ensure a successful and durable restoration.
Summary: Engineering Protocols for Structural Foam Application
- Why DIY Spray Kits Often Fail to adhere to Cold Concrete Walls?
- How to Inject Foam into Blind Wall Cavities Without Removing Drywall?
- HFO vs. HFC Blowing Agents: Which Foam Is Less Harmful to the Ozone?
- The Surface Prep Mistake That Causes Foam to Delaminate in 5 Years
- When to Schedule Foam Sprayers: Before or After Electrical Rough-In?
- How to Spot Dry Rot in Studs Before You Cover Them with Spray Foam?
- Open Cell vs. Closed Cell: Which One Belongs in Your Basement Rim Joist?
- Can Your Roof Trusses Support the Weight of R-60 Blown-In Insulation?
Why DIY Spray Kits Often Fail to adhere to Cold Concrete Walls?
One of the most common and costly failures in foam application, particularly in Canadian basements, is delamination from cold concrete surfaces. The issue is rooted in fundamental thermodynamics. DIY kits and even some professional applications fail because they focus on ambient air temperature, ignoring the much more critical substrate temperature. The chemical reaction that creates polyurethane foam is exothermic, but it requires a specific activation energy to initiate properly. A cold, dense substrate like concrete acts as a massive heat sink, pulling thermal energy out of the reacting foam too quickly.
When the foam hits a cold surface, the reaction is quenched at the point of contact. This results in a friable, poorly-cured layer with virtually no adhesive properties. The bulk of the foam may look fine, but the bond line is compromised from the start. According to industry experts, the ideal temperature for spray foam application is within a specific range, often cited as 60°F to 80°F (15.5°C to 26.6°C) for the substrate itself. Attempting an application on a 5°C concrete wall, even in a 20°C room, is a recipe for failure.
Professional protocols for Canadian winters are rigorous. They involve pre-heating the substrate for at least 24 hours with indirect heaters, using specially formulated “winter-blend” foams, and applying a thin “flash coat” of about 1/4 inch. This initial thin layer reacts and generates its own heat, effectively warming the substrate and creating a properly bonded anchor for subsequent layers. Ignoring these thermodynamic principles is why so many DIY projects result in foam sheets peeling away from the wall within a single season.
How to Inject Foam into Blind Wall Cavities Without Removing Drywall?
For restoration projects where preserving existing interior finishes is paramount, the prospect of removing drywall to insulate and reinforce a wall is a non-starter. This is where injection foam technology, when paired with advanced diagnostics, provides a significant engineering advantage. The process allows for the creation of a monolithic structural core within an existing wall assembly without demolition. The key is to overcome the challenge of the “blind” application—ensuring complete fill without voids and, critically, without blowing out the drywall.
The standard method involves drilling small holes between each stud, typically at the top, middle, and bottom of the cavity. A specialized, slow-catalyst polyurethane foam is then injected. Unlike standard spray foam, this material is designed to expand slowly and with low pressure, flowing like a liquid to fill every crevice before it begins to cure. This controlled expansion is crucial to prevent pressure buildup that could crack or “pillow” the drywall. The most innovative and reliable approach incorporates thermal imaging throughout the process.
Case Study: Thermal Imaging for Zero-Failure Injection
Experienced Canadian contractors now use high-resolution thermal imaging cameras to provide real-time feedback during injection. The camera gives the technician what amounts to X-ray vision into the wall. As the foam is injected, its exothermic reaction shows up as a warm signature on the thermal display. The technician can see exactly where the foam has flowed, identify any potential voids or blockages (like fire-blocking or old insulation), and confirm a complete, monolithic fill before moving to the next cavity. This eliminates guesswork and provides the client with indisputable visual proof of a perfectly insulated wall.
This split-screen view demonstrates the power of thermal diagnostics in a blind cavity injection process.
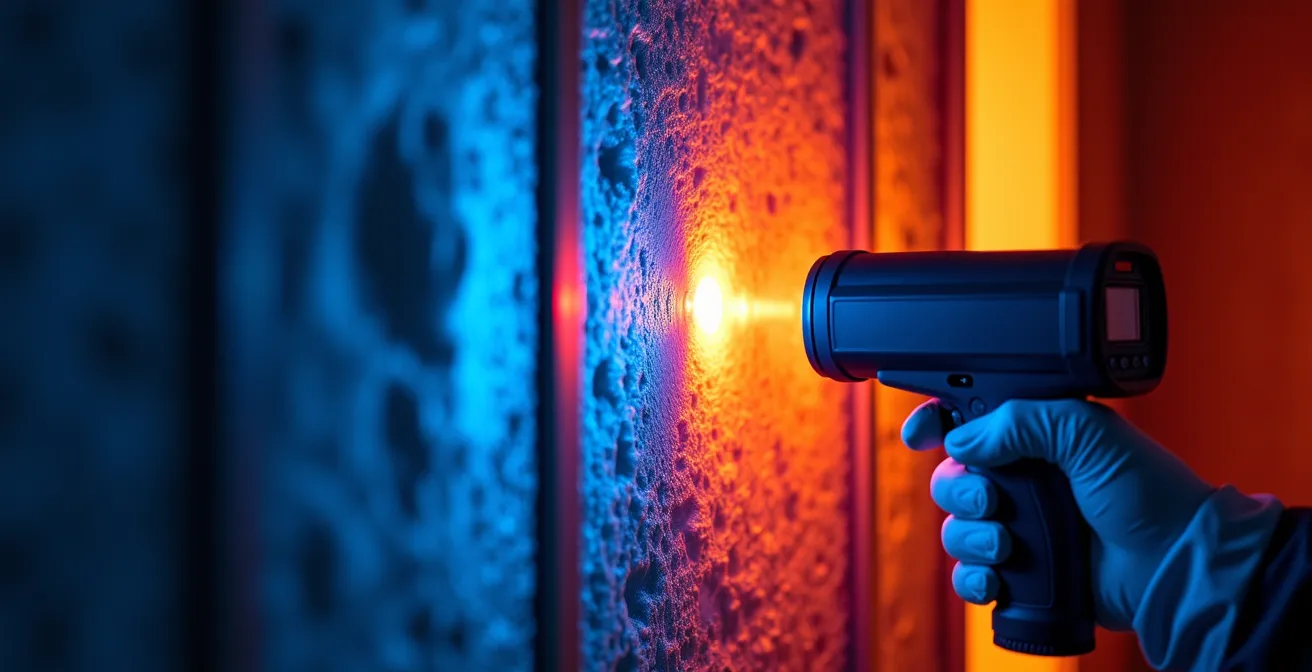
On the left, the cool blue tones indicate empty, uninsulated cavities, representing significant thermal bridging. On the right, the warm orange and red hues show a cavity completely and uniformly filled with foam after the injection process. This method transforms a potentially risky procedure into a precise, verifiable engineering protocol.
HFO vs. HFC Blowing Agents: Which Foam Is Less Harmful to the Ozone?
The performance and environmental impact of closed-cell foam are largely dictated by its blowing agent—the gas trapped within the foam’s cells that provides its insulating properties. For decades, the industry relied on hydrofluorocarbons (HFCs). While they have zero Ozone Depletion Potential (ODP), their Global Warming Potential (GWP) is alarmingly high, often 700 to 1,400 times that of carbon dioxide. In line with the Montreal Protocol and Canadian environmental regulations, HFCs are being phased out.
The successor technology is hydrofluoroolefin (HFO) blowing agents. These fourth-generation agents represent a significant leap forward. They maintain zero ODP while boasting a GWP of less than 10. From an engineering and sustainability perspective, specifying HFO-based foams is now standard practice for any forward-thinking restoration project, particularly those targeting certifications like LEED Canada, which award additional credits for their use.
Beyond the environmental benefits, HFO-based foams often exhibit superior performance characteristics. They can yield a slightly higher R-value per inch (up to R-7) and demonstrate better adhesion and performance in the cold weather conditions common across Canada. This makes them not just the ethical choice, but often the technically superior one. As an engineer, it’s crucial to verify the product’s formulation. A key point of verification in Canada is related to product identification. As the Canadian Construction Materials Centre (CCMC) has stipulated:
Closed cell SPF that have CCMC listings are required to have a unique colour for field identification
– Canadian Construction Materials Centre, Wikipedia – Spray Foam Standards
The following table, based on data from sources like Natural Resources Canada’s guidelines, summarizes the critical differences for the Canadian market.
| Characteristic | HFO (4th Generation) | HFC (3rd Generation) |
|---|---|---|
| Ozone Depletion Potential (ODP) | Zero | Zero |
| Global Warming Potential (GWP) | Less than 10 | 700-1,400 |
| Montreal Protocol Status | Future-proof | Phase-out by 2025-2030 |
| Cold Weather Performance | Superior adhesion at low temps | Standard performance |
| R-Value per inch | R-6.5 to R-7 | R-6 to R-6.5 |
| Canadian Availability | BASF, Huntsman, Demilec | Widely available |
| LEED Canada Points | Additional credits available | Standard credits only |
The Surface Prep Mistake That Causes Foam to Delaminate in 5 Years
While foam formulation and temperature are critical, the most insidious cause of long-term failure is improper surface preparation. Delamination that occurs years after application is almost always traced back to a contaminated or unsuitable substrate at the time of spraying. The chemical bond of polyurethane foam is powerful but incredibly sensitive. It requires a clean, dry, and chemically compatible surface to achieve a permanent, structural-level adhesion. Any intervening layer, whether it’s microscopic dust, moisture, or chemical residue, will act as a bond-breaker.
Sawdust is a primary culprit in new construction or restoration. It coats surfaces and absorbs moisture, creating a weak, hygroscopic layer that prevents the foam from bonding directly to the timber or sheathing. Similarly, any oil, grease, or certain types of oil-based primers must be removed or abraded, as they are chemically incompatible with the foam. The foam is applied at very high temperatures, often between 130°F to 150°F (54°C to 65°C), and this heat can liquefy surface contaminants, further compromising the bond.
The most critical contaminant, however, is moisture. Applying foam to a substrate with a moisture content above 19%, or to a surface below the dew point where condensation is present, guarantees failure. The water reacts with the isocyanate in the foam mixture, creating carbon dioxide gas at the bond line. This off-gassing creates a layer of bubbles and prevents the foam from “wetting” the surface, resulting in a bond that is mechanical at best, and will eventually fail under the stress of thermal cycling. An engineering-led approach demands a rigorous, multi-point surface audit before any foam is applied.
Action Plan: Pre-Application Surface Integrity Audit
- Debris & Dust Purge: Meticulously clean all substrates using high-pressure compressed air and industrial vacuums to remove all dust, sawdust, and loose debris. The surface must be bare.
- Hygrometric & Thermal Verification: Use a calibrated moisture meter to confirm wood moisture content is below 19%. Concurrently, use an infrared thermometer to verify the substrate temperature is at least 3°C above the dew point to prevent condensation.
- Contaminant Neutralization: Visually inspect for and mechanically scuff any oil-based paints, primers, or releasing agents. Treat any visible signs of organic growth with an appropriate fungicidal wash and allow to dry completely.
- Adhesion Patch Test: On a representative section of each substrate type (e.g., old timber, new sheathing, concrete), apply a small test patch of foam. After curing, attempt to remove it by hand. It should shred, indicating cohesive failure (the foam itself breaks), not adhesive failure (peeling off the surface).
- Final Go/No-Go Check: Immediately prior to full-scale application, perform a final, quick verification of key parameters (temperature, moisture, cleanliness) to ensure conditions have not changed.
When to Schedule Foam Sprayers: Before or After Electrical Rough-In?
In a restoration project, sequencing of trades is a complex dance, and the decision of when to apply spray foam relative to the electrical rough-in is a critical engineering checkpoint. The unequivocal answer is: foam is always applied after the electrical and plumbing rough-ins are complete and, crucially, after they have been inspected and passed by the local authority. This is a non-negotiable step in most Canadian municipalities. Insulating walls before this inspection conceals the work, leading to a failed inspection and the costly, destructive process of removing foam to expose wiring and piping.
The correct protocol involves completing all in-wall work first: wiring, junction boxes, plumbing lines, and vent stacks. Once the inspector has signed off, the foam applicators can proceed. However, the work is not yet finished. A key strategy for future-proofing is the “box out” method. This involves creating protective channels and access voids around critical components before the foam is sprayed. Hardened closed-cell foam is incredibly dense and difficult to remove, making future access to a junction box or water shut-off a major undertaking.
By creating these voids, you maintain access without compromising the structural or thermal envelope. This foresight is a hallmark of a well-engineered restoration.
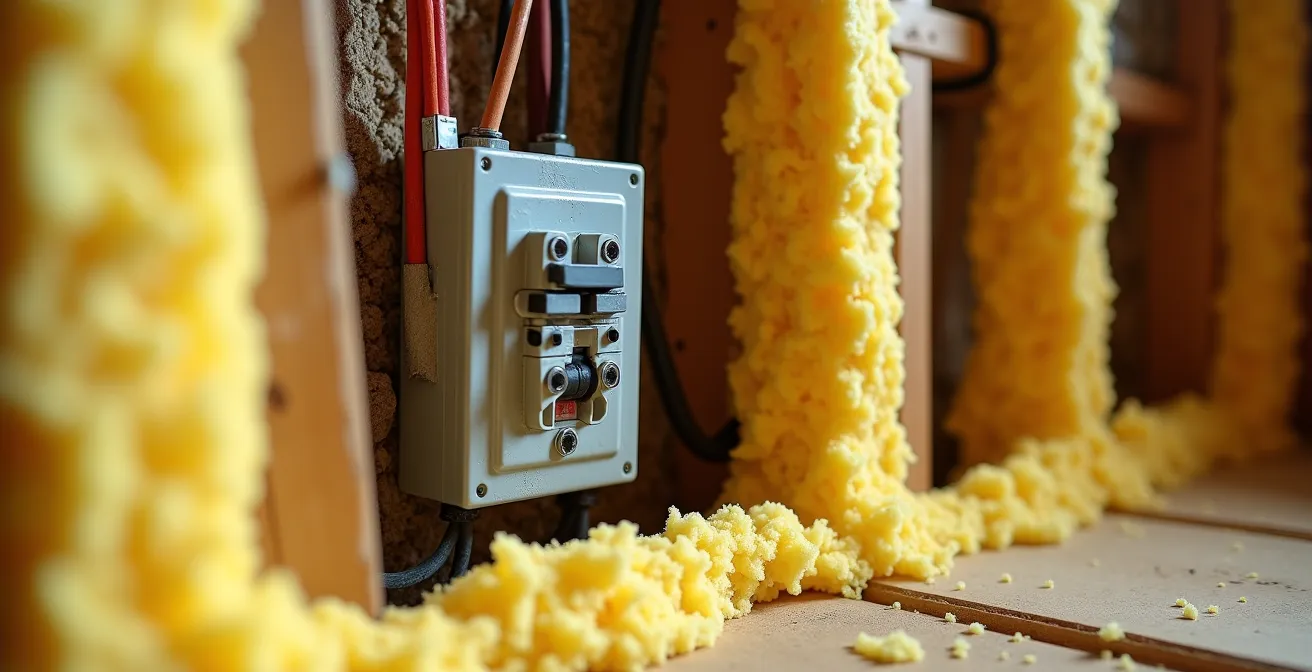
As seen here, cardboard or plastic collars are built around electrical boxes, clean-outs, and valves. The foam is then sprayed around these barriers. Once cured, the barrier material is removed, leaving a clean, accessible void. This simple step saves immense time and cost for any future maintenance or upgrades, demonstrating a design that considers the entire lifecycle of the building, not just the initial construction phase.
How to Spot Dry Rot in Studs Before You Cover Them with Spray Foam?
The promise of foam adding structural rigidity is predicated on having a viable structure to reinforce. Applying spray foam over wood affected by dry rot is not just ineffective; it’s dangerous. The foam will not restore strength to compromised wood fibres and, by creating an air and vapour barrier, it can trap moisture and accelerate the decay of adjacent, previously healthy wood. Therefore, a thorough inspection for dry rot (such as *Serpula lacrymans*) is the most critical first step before any insulation is considered. This is especially true in the damp, cool environments of older Canadian basements.
Visual inspection is the start. Look for darkened, shrunken wood with cubical cracking patterns. However, rot can be hidden behind a thin veneer of healthy-looking wood. This is where physical testing becomes essential. The goal is to assess the integrity of the wood fibres themselves.
Field Protocol: The Screwdriver Test for Canadian Basements
As recommended by authorities like Natural Resources Canada, the “screwdriver test” is a simple but effective diagnostic tool. The process involves systematically probing suspect timber frame members with a sharp object like a screwdriver or an awl. Healthy, sound wood will resist penetration and produce a sharp, solid sound. Wood affected by the cubic-brown rot common in Canada will feel soft, spongy, or crumbly. The tool will penetrate easily with little resistance. Another key indicator often found in the enclosed spaces of older homes, particularly those with fieldstone foundations in Eastern Canada, is a distinct, musty, mushroom-like odour, which signals active fungal growth.
Once rot is identified, a decision on remediation must be made. The temptation to simply spray over it must be resisted. As building science professionals emphasize, the approach depends on the extent of the damage.
Building science professionals report that small, localized spots of rot can be treated by cutting out affected sections and applying borate treatment. However, widespread rot compromises structural integrity and requires professional assessment before considering spray foam as a ‘structural’ solution, as the foam cannot restore strength to already weakened wood members.
– Building Science Professionals, as reported by SprayFoam.com
Covering compromised wood is a fundamental engineering error. The structure must be made sound before it can be enhanced.
Open Cell vs. Closed Cell: Which One Belongs in Your Basement Rim Joist?
When selecting a foam for a specific location, the choice between open-cell and closed-cell is a critical engineering decision. In a location like a basement rim joist—a notorious source of air leakage and thermal bridging—the choice is clear: closed-cell foam is the only appropriate specification. The reason lies in the fundamental differences in their cellular structure and resulting physical properties.
Open-cell foam has a cell structure that is not completely closed. The cells are broken, allowing air to fill them. This makes the foam soft, flexible, and an excellent sound dampener. However, it also means it is vapour-permeable. In a below-grade application like a Canadian basement rim joist, which is adjacent to damp soil, using a vapour-permeable material is a severe design flaw. It can allow moisture from the exterior to enter the wall assembly, leading to condensation, mould, and rot in the very wooden members you are trying to protect. Open-cell foam has no place in below-grade or high-humidity environments.
Closed-cell foam, by contrast, has a rigid structure of discrete, sealed cells filled with an inert gas. This structure makes it both an air barrier and a vapour barrier, preventing moisture intrusion. But its most important characteristic for a restorer is its structural strength. The rigid, dense nature of closed-cell foam allows it to adhere to and brace the components it touches, creating that monolithic composite. Research by the NAHB has shown that walls with closed-cell spray foam can have their racking strength—the ability to resist lateral forces from wind or seismic events— increased by up to 300%. This is the property that transforms it from a simple insulator into a structural component, making it the definitive choice for reinforcing weakened timber frames and rim joists.
Key Takeaways
- SPF as a Structural Component: Treat closed-cell foam not as mere insulation, but as an integral part of the engineered structural assembly, capable of dramatically increasing wall rigidity.
- Thermodynamics Over Environment: Successful adhesion is dictated by substrate temperature and moisture control, not ambient air temperature. This is the primary point of failure.
- Assess Before Reinforcing: Foam cannot restore strength to rotted wood. A thorough structural and moisture assessment of the existing timber is the mandatory first step before any application.
Can Your Roof Trusses Support the Weight of R-60 Blown-In Insulation?
While this guide focuses on the structural benefits of foam in walls, an engineer’s perspective demands a holistic view of the building envelope. A common upgrade in Canadian home restorations is increasing attic insulation to R-60 or more. However, this seemingly simple improvement adds significant dead load to the roof structure, a factor that is often overlooked. Before specifying a thick layer of blown-in cellulose or fiberglass, you must verify that the existing roof trusses can support the additional weight.
The weight of insulation varies significantly by type. Cellulose, made from recycled paper, is denser and heavier than fiberglass. The difference is substantial. For a typical 1000 sq. ft. attic, achieving R-60 with cellulose can be significantly heavier than using fiberglass. According to data from Natural Resources Canada, for a 1000 sqft attic, R-60 cellulose weighs approximately 1300 lbs (590 kg) more than the equivalent R-value in blown-in fiberglass. Piling this unexpected load onto trusses not designed for it can lead to sagging, cracking, or catastrophic failure.
The verification process is a straightforward structural engineering exercise. For most Canadian homes built after the 1970s, truss engineering documents should exist. These documents specify the design loads, including the Bottom Chord Dead Load (BCDL), which is the maximum weight the bottom member of the truss is designed to support, including insulation and drywall. The protocol involves comparing the total calculated load (existing drywall + new insulation) to this BCDL specification. If documents are unavailable or if there are any visible signs of stress like bowing or cracking, a licensed Canadian structural engineer must be consulted before proceeding.
Frequently Asked Questions on Structural Foam Application
What is the ‘box out’ strategy for future access?
The “box out” strategy involves creating channels or voids with cardboard or coroplast around critical components like junction boxes, water shut-offs, and clean-outs before spraying foam. After the foam cures, the material is removed, leaving a clean access path. This ensures that future maintenance or upgrades can be performed without having to excavate the hardened, dense foam.
When should the building inspector visit?
In almost all Canadian municipalities, the building inspector must visit and pass the electrical and plumbing rough-in *before* the walls are insulated. Concealing wiring or pipes with foam before this inspection will result in a failure and require costly removal of the foam. Therefore, foam sprayers should only be scheduled after the rough-in inspections are officially passed.