Contrary to common belief, acoustic sealant isn’t just a flexible caulk; it’s a permanent viscoelastic damper designed to preserve structural decoupling, the true secret to effective soundproofing.
- It absorbs vibrational energy by converting it to heat, instead of just blocking air.
- It remains non-hardening for decades, preventing the formation of rigid sound bridges that standard caulk creates over time as it shrinks and cracks.
Recommendation: Always use a non-hardening, butyl-based acoustic sealant for all concealed joints and perimeters in your soundproofing assembly to ensure long-term system integrity.
When soundproofing a room, the common approach is to focus on mass and absorption—adding dense drywall and filling wall cavities with insulation. These are critical steps, but they are often undermined by a detail that is frequently misunderstood or overlooked: the sealant used to fill gaps. Many DIYers and even some contractors reach for standard paintable caulk, assuming its flexibility is sufficient. This is a fundamental engineering error that compromises the entire soundproofing system.
The assumption is that if a gap is filled, sound is blocked. However, sound, particularly low-frequency structural vibration, doesn’t just travel through air; it travels through solid materials. Regular caulk hardens over time, creating a rigid bridge between building elements. This bridge efficiently transfers vibrational energy from one side of the wall to the other, negating the benefits of expensive decoupling measures like resilient channels.
The key isn’t just flexibility, but a permanent state of viscoelastic damping. This is where acoustic sealant—often a black, non-hardening butyl rubber compound—fundamentally differs. It’s not designed to be a simple gap filler; it’s an engineered material that maintains structural decoupling. It dissipates sound energy as minute amounts of heat rather than passing it along.
This guide moves beyond the surface-level “what” and delves into the engineering “why.” We will explore how to properly apply this material, why it is non-negotiable for certain applications, and how it functions as an essential part of a complete, high-performance soundproofing system designed to last for decades, especially within the demanding context of Canadian climate variations.
This article provides a detailed engineering perspective on the critical role of acoustic sealant. Explore the sections below to understand the specific principles and applications that ensure a truly soundproofed space.
Summary: Acoustic Sealant vs. Regular Caulk: Why the Black Stuff Matters in Soundproofing
- The Two-Bead Rule: How to Caulk Drywall for Maximum Sound Blocking?
- Putty Pads: How to Stop Sound Leaking Through Outlets?
- How to Seal the Gap Under the Drywall Without Bridging Vibration?
- Silicone or Acoustical Caulk: Which Stays Flexible for 20 Years?
- How to Install Automatic Door Bottoms for a Soundproof Home Office?
- The Venting Mistake That Allows Noise to Bypass Insulated Walls
- The “Ankle Biter” Draft: How to Seal Baseboards to Stop Cold Air?
- How to Soundproof a Home Office Against Street Noise for Under $1,000?
The Two-Bead Rule: How to Caulk Drywall for Maximum Sound Blocking?
In acoustic engineering, every connection point is a potential failure point. The “Two-Bead Rule” is not a stylistic choice but a structural necessity for creating a hermetically sealed, decoupled wall assembly. Standard practice often involves a single bead of caulk on the outer perimeter, treated as an afterthought. This is insufficient. The first bead of acoustic sealant is applied to the floor and ceiling plates (runners) before the first layer of drywall is installed. As the drywall is screwed into place, this bead compresses, creating a gasket that prevents air and sound leakage at the structural level.
The second bead is applied for double-layer drywall systems. It goes around the perimeter of the first drywall layer before the second layer is installed. This ensures that the air gap between the two drywall layers—a critical component of the soundproofing system—is completely sealed off from the rest of the structure. This method prevents sound from flanking around the drywall layers. According to industry testing, properly sealed walls can improve an STC rating from 28-32 to 37-39, a significant and clearly audible reduction in noise transmission.
The choice of sealant for each layer is also a technical decision. A non-paintable, non-hardening butyl sealant is ideal for the first, concealed layer, while a paintable latex-based acoustic sealant can be used for the final, visible layer for aesthetic finishing. This addresses the common question of paintability without compromising the core acoustic integrity.
This table compares the two primary types of acoustic sealant available in Canada, guiding the choice for each application layer.
| Property | Butyl-Based (Black) | Latex-Based |
|---|---|---|
| Flexibility | Never fully cures, stays flexible 20+ years | Remains flexible but can harden over time |
| Paintability | Cannot be painted, remains tacky | Paintable after 24 hours |
| Best Layer Application | First/concealed layer | Second/visible layer |
| Canadian Availability | MONO at Canadian Tire, OSI SC-175 | LePage PL Acousti-Seal at Home Hardware |
| Temperature Range | -30°C to +30°C flexibility | -20°C to +25°C flexibility |
Action Plan: Implementing the Two-Bead Sealant Method
- Apply the first 1/4-inch continuous bead of acoustic sealant on all runners at the ceiling and floor before installing the first layer of drywall.
- Install the first drywall layer, ensuring the sealant squeezes out slightly at the perimeters to confirm a complete seal.
- For double-layer systems, apply a second bead around the perimeter of the first layer before installing the second layer, making sure to stagger all drywall seams.
- Seal around all electrical boxes and other wall penetrations with a continuous bead before installing faceplates.
- Allow a full 48 hours for the sealant to properly set and skin over before applying any drywall mud or paint to the final layer.
Putty Pads: How to Stop Sound Leaking Through Outlets?
Electrical outlets, light switches, and data ports are essentially gaping holes in a soundproof wall. They represent a classic “flanking path,” allowing sound to bypass all the mass and absorption you have painstakingly installed. While filling the wall cavity with insulation helps, it doesn’t address the direct air path created by the back of the electrical box. Simply caulking around the box’s face is not enough; the box itself acts like a drum, vibrating and transmitting sound.
The engineered solution is an acoustic putty pad. This is a dense, malleable, fire-rated material that you wrap around the back and sides of an electrical box. Its function is twofold. First, it adds mass directly to the thin metal or plastic box, damping vibrations and reducing resonance. Second, it creates a complete, airtight seal against the drywall and, critically, the vapour barrier. A punctured vapour barrier is a major building code issue in Canada, and putty pads help maintain its integrity around penetrations.
In many commercial and multi-family constructions, their use is not optional. As one case study highlights, in Canadian condominiums with fire-rated party walls, ULC-rated putty pads are mandated by provincial building codes to restore the fire-resistance rating of the wall assembly where it’s penetrated by an outlet box. While the primary driver is fire safety, the acoustic benefit is a direct and significant consequence. This makes putty pads a legal requirement that doubles as a best-practice soundproofing measure.
Case Study: Canadian Condo Party Wall Putty Pad Requirements
In Canadian condominiums with fire-rated party walls, electrical boxes create significant flanking paths that compromise both fire ratings and sound isolation. Provincial building codes mandate ULC-rated putty pads to restore fire-resistance ratings, making them legally required, not optional soundproofing extras. Fire-Rated Putty Pads properly installed can maintain the assembly’s fire rating while also providing critical acoustic sealing around these weak points.
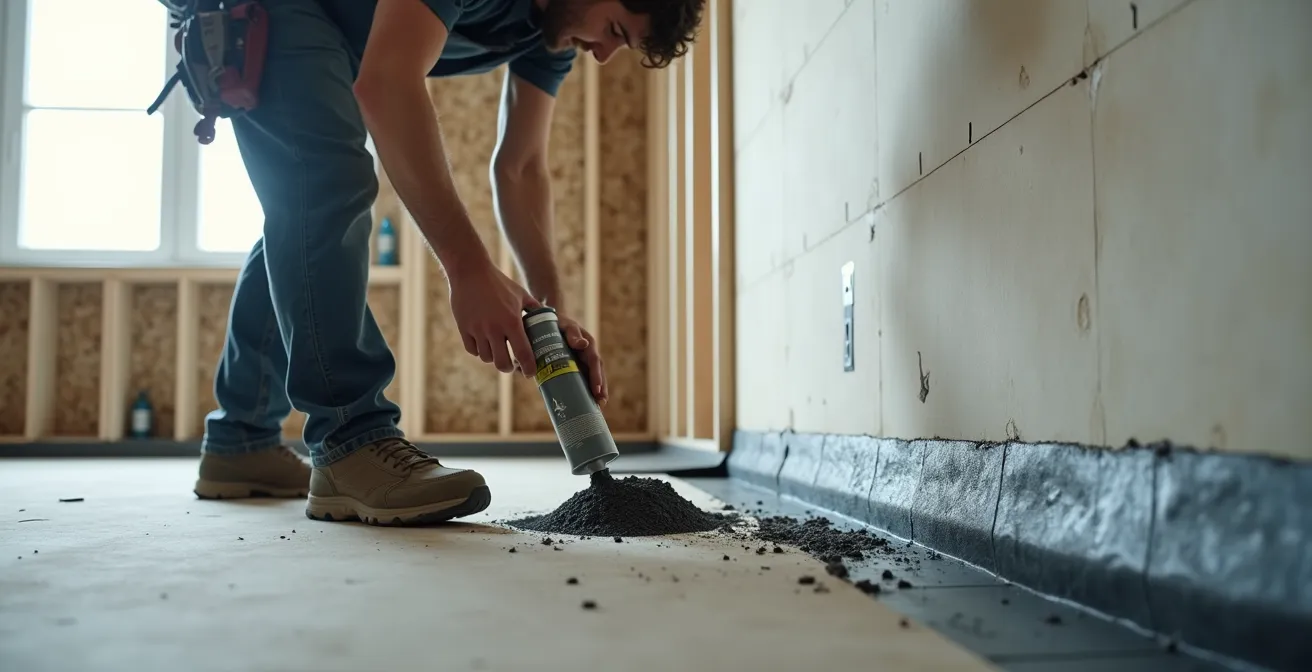
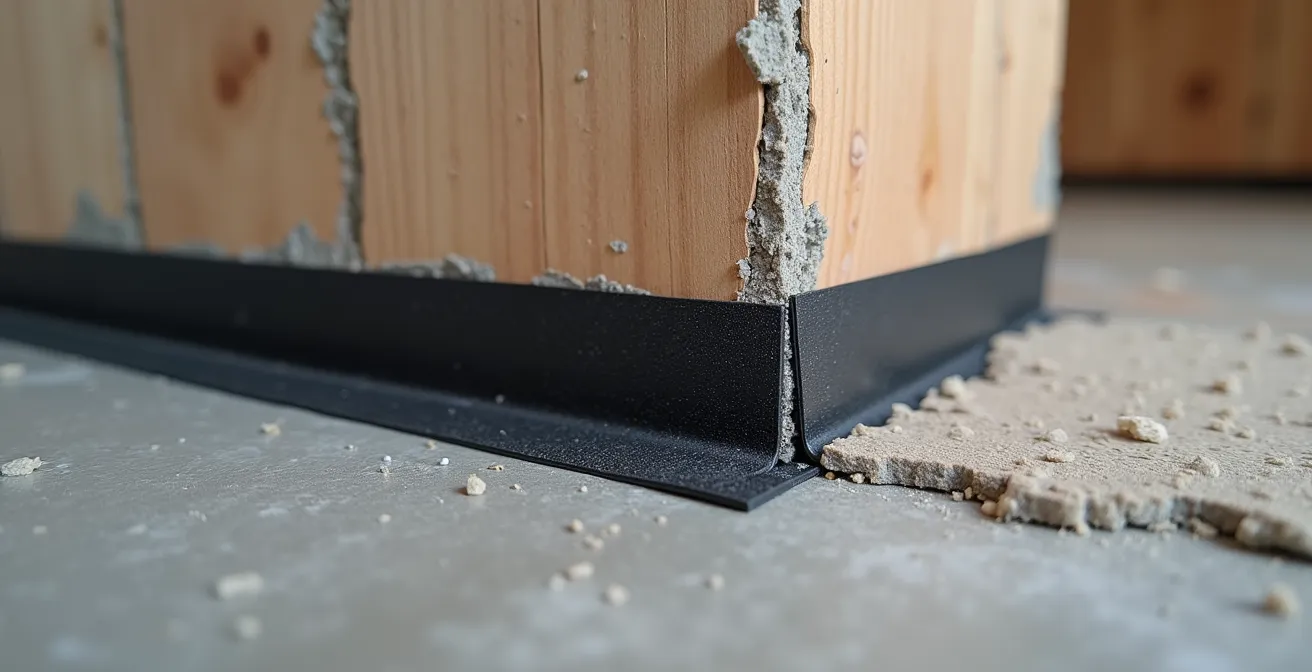
How to Seal the Gap Under the Drywall Without Bridging Vibration?
A common construction practice, especially in basements, is to leave a small gap (typically 1/4 to 1/2 inch) between the bottom edge of the drywall and the floor. This is done to prevent moisture wicking from the concrete slab into the gypsum panel. However, this gap creates a significant flanking path for sound. The temptation is to fill it with a rigid material like drywall compound or standard caulk. This is a critical mistake that creates a rigid vibrational bridge between the wall assembly and the floor, short-circuiting decoupling elements like resilient channels.
This is precisely where non-hardening acoustic sealant demonstrates its unique properties. A thick bead of sealant is applied into this gap, adhering to both the bottom of the drywall and the floor. Because the sealant never fully cures and remains a pliable, tacky compound, it forms a complete airtight seal without creating a solid connection. It allows the wall and floor to move and vibrate independently, preserving the structural decoupling that is the cornerstone of effective soundproofing. The unsealed gaps left by this common construction practice can lead to up to 100 times more noise transmission, effectively rendering much of the wall’s soundproofing features useless.
The visual below illustrates this principle. The black, butyl-based sealant acts as a flexible gasket, accommodating microscopic movements and thermal expansion/contraction cycles (a major factor in Canadian climates) without cracking or pulling away. It isolates the wall from floor-borne vibrations, such as footsteps from a floor above or the rumble from a basement furnace.
As the image demonstrates, the material’s job is not to be hard, but to be a permanent, viscoelastic damper. It absorbs energy at this critical junction, completing the soundproofing system where it is most vulnerable. This is a concept that standard caulk, by its very chemical nature, cannot achieve long-term.
Silicone or Acoustical Caulk: Which Stays Flexible for 20 Years?
The term “flexible” is where most confusion between standard caulk and acoustic sealant arises. A new bead of 100% silicone caulk is indeed very flexible. However, it is a *curing* product. It reacts with moisture in the air to solidify into a firm, elastic rubber. While it remains flexible for a few years, it is susceptible to shrinkage, hardening, and eventual cracking, especially when subjected to the extreme temperature cycles of a Canadian winter. When it becomes rigid, it turns into a perfect conductor for sound vibrations.
Acoustic sealant, specifically the butyl rubber variety, is a non-curing, non-hardening compound. It is designed to remain in a permanently tacky, pliable state, much like a dense grease. This is its single most important characteristic. It does not shrink because it does not cure. This ensures that for the life of the building (20+ years), it will not pull away from the joint or become a rigid sound bridge. As noted by experts, “Unlike traditional caulking, acoustical caulking is made of latex that remains flexible permanently, which is much better for soundproofing. The reason caulk that stays flexible when hardened is better is that it doesn’t shrink or crack.”
Unlike traditional caulking, acoustical caulking is made of latex that remains flexible permanently, which is much better for soundproofing. The reason caulk that stays flexible when hardened is better is that it doesn’t shrink or crack.
– Acoustical Surfaces Inc., Technical Analysis of Acoustic Sealants
While the initial cost of acoustic sealant is higher, its long-term performance makes it far more cost-effective. A silicone-sealed joint may need to be redone every 3-5 years to maintain its seal, whereas an acoustic sealant joint is a single, permanent application. The following table breaks down the true cost and performance over a 20-year lifespan in a demanding climate.
| Performance Factor | Butyl Acoustic Sealant | Standard Silicone |
|---|---|---|
| Initial Cost (per tube) | $10-12 CAD | $4-6 CAD |
| Flexibility at -30°C | Maintains full flexibility | Becomes rigid, may crack |
| Expected Lifespan | 20+ years without replacement | 3-5 years before failure |
| Temperature Cycling Performance | No shrinkage or separation | Progressive shrinkage and gaps |
| 20-Year Total Cost (10 tubes) | $100-120 (one application) | $160-240 (4 applications) |
| Chemical Properties | Non-hardening butyl rubber | Cures to firm elastic state |
How to Install Automatic Door Bottoms for a Soundproof Home Office?
A perfectly constructed, sealed, and insulated wall can be rendered ineffective by a poorly sealed door. The gap at the bottom of the door is the most significant point of sound leakage in an otherwise well-treated room. Standard door sweeps that drag on the floor create friction and wear out, and fixed thresholds create a tripping hazard. The professional solution is an automatic door bottom.
This is a mechanical device mounted to the face or mortised into the bottom of the door. It contains a concealed, spring-loaded neoprene or silicone seal. A small plunger on the hinge side of the door contacts the door jamb as the door closes, which mechanically drops the seal to form a tight connection with the threshold. When the door is opened, the seal retracts automatically. This provides a perfect seal when needed and no floor friction when the door is in motion. It’s an elegant engineering solution to a common problem.
Installation is straightforward for a DIYer with basic tools. The key is precise measurement and adjustment. The unit must be cut to the exact width of the door, and the plunger must be adjusted so the seal drops firmly onto the threshold without preventing the door from latching securely. For maximum effectiveness, a small bead of acoustic sealant should be applied where the ends of the automatic door bottom housing meet the door jamb stops, sealing the final tiny gaps in the corners.
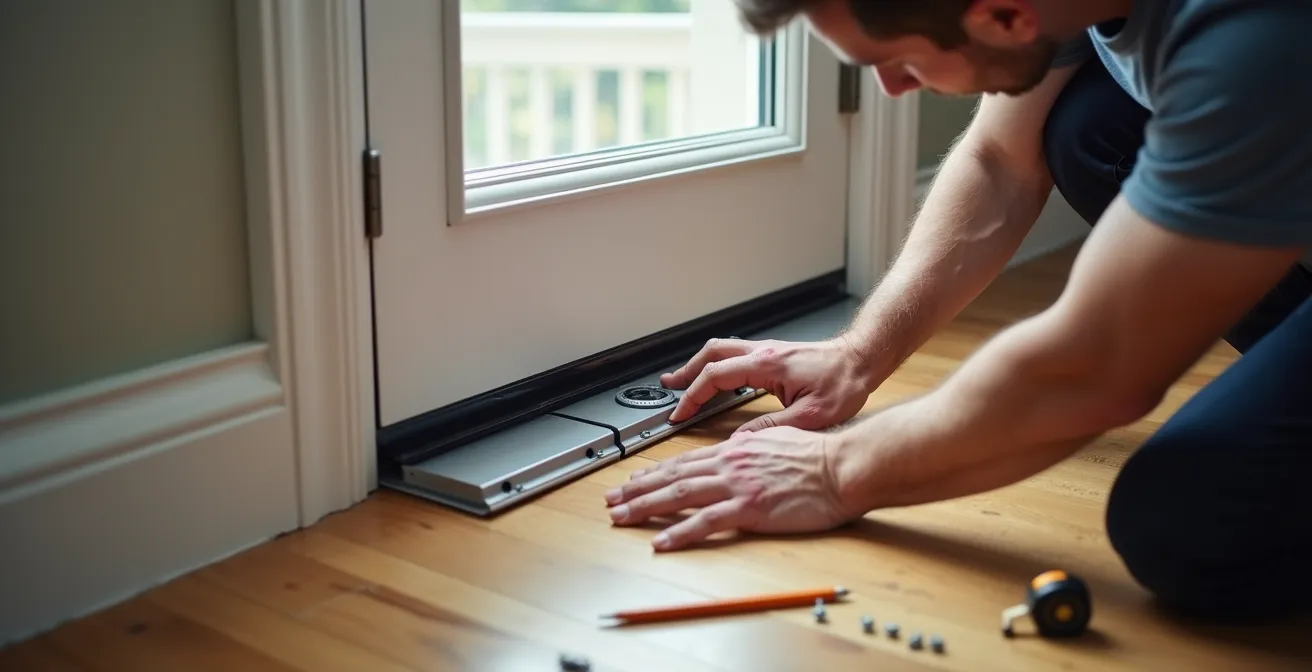
The following steps provide a clear guide for a surface-mount installation, which is the most common type for retrofitting a home office door.
- Measure the door width and cut the automatic door bottom to size, leaving approximately 1/8-inch of clearance on each side.
- Position the unit on the face of the door so that the seal just touches the threshold when the door is fully closed.
- Mark the screw holes with a pencil, using a level to ensure the installation is perfectly horizontal.
- Pre-drill pilot holes for the screws. This is especially important for hollow-core doors to prevent the wood from splitting.
- Attach the unit with the provided screws and test the plunger’s action by closing and opening the door several times.
- Adjust the plunger’s tension screw so the seal drops completely but does not create so much pressure that the door is difficult to latch.
- Apply a small dab of acoustic sealant at the ends of the unit where it meets the door jamb to complete the seal.
The Venting Mistake That Allows Noise to Bypass Insulated Walls
One of the most frustrating scenarios in soundproofing is building a high-STC wall, only to find that you can still clearly hear conversations from the next room. Often, the culprit is not the wall itself but a flanking path you didn’t consider: the HVAC ductwork. In modern Canadian homes, centralized Heat Recovery Ventilators (HRVs) or forced-air systems often use “back-to-back” vents, creating a direct, uninsulated tunnel for sound to travel between rooms.
Sealing the drywall penetrations for these vents with acoustic sealant is a required first step, but it doesn’t solve the core problem of the open airway. The sound simply travels through the duct. The solution is to break this direct line of sight and absorb sound within the ductwork itself. This can be achieved by constructing a DIY duct muffler box or a “quiet-vent” assembly within the joist bay or wall cavity.
This involves building a small, sealed plywood box and lining it with 2-inch thick acoustic insulation like mineral wool. The duct path is then rerouted through the box in an S-shape using insulated flexible ducting. This forces the sound waves to take a longer path and reflect off the absorptive surfaces inside the box, significantly attenuating the noise before it exits the vent in the adjacent room. As one analysis of modern Canadian homes points out, even the best-constructed wall assembly will fail if compromised by flanking noise through ductwork. Sealing these paths is as vital as the wall’s construction.
Case Study: HRV System Flanking Path in Canadian Homes
Modern Canadian homes with centralized Heat Recovery Ventilators (HRVs) face a critical soundproofing challenge: even the best-constructed wall assembly will fail to achieve its sound reduction potential if compromised by flanking noise that seeps through ductwork connections. Sealing off these flanking paths is just as vital as the selection of wall type itself.
The “Ankle Biter” Draft: How to Seal Baseboards to Stop Cold Air?
The small, often imperceptible gap between the bottom of the baseboard and the floor, or between the top of the baseboard and the drywall, is a notorious source of cold air drafts in the winter—the “ankle biter” effect. In soundproofing, this same gap is a critical flanking path for noise. Filling this gap is essential for both thermal comfort and acoustic isolation.
Once again, the choice of material is paramount. Using a rigid filler like wood putty or a standard caulk that will harden and crack is a short-term fix. As the house settles and materials expand and contract with Canada’s dramatic temperature swings, these rigid fillers will fail, reopening the gap. This is where a permanently flexible acoustic sealant, like LePage PL Acousti-Seal, demonstrates its value. It is designed to adhere to a wide variety of materials and remain pliable even at extremely low temperatures.
As the product’s technical data confirms, it is “incredibly durable, remaining flexible at extremely low temperatures and resisting water even when immersed.” This durability ensures that the seal remains intact year after year, preventing both drafts and sound leaks. Because these sealants do not dry hard, they can accumulate dust over time in visible areas, so application should be neat and minimal for aesthetic purposes. For baseboards, applying a fine bead and smoothing it into the corner creates a permanent, effective seal. A single tube can go a long way, as one tube of acoustic sealant provides about 40-80 linear feet of coverage with a 1/4″ bead, enough for several rooms.
LePage PL Acousti-Seal is incredibly durable, remaining flexible at extremely low temperatures and resisting water even when immersed. Since this adhesive does not dry, it’s normal for it to accumulate dirt, but this won’t affect its functionality.
– LePage Technical Specifications, Home Depot Canada Product Information
Key Takeaways
- Acoustic sealant is a non-hardening, viscoelastic damper, not just a flexible caulk. It dissipates vibration energy.
- Proper application involves a two-bead system and sealing all penetrations like outlets and gaps under drywall to eliminate flanking paths.
- The material’s ability to stay permanently flexible over 20+ years, even in cold climates, is what preserves structural decoupling and system integrity.
How to Soundproof a Home Office Against Street Noise for Under $1,000?
Achieving significant sound reduction against low-frequency street noise, like traffic or a Toronto streetcar, requires a systems-based approach. It is not about one magic product, but about applying the four principles of soundproofing: mass, absorption, decoupling, and sealing. A highly effective wall assembly can be built for a standard 12’x8′ exterior wall for under $1,000 CAD by strategically allocating resources.
The core of the system is decoupling the drywall from the wall studs using resilient channels. This mechanical separation prevents vibrations from traveling through the structure. The wall cavity should be filled with high-density acoustic insulation, like Rockwool Safe’n’Sound, to absorb airborne sound. Mass is then added by using two layers of 5/8″ Type X drywall, which is denser than standard 1/2″ board. A single-layer wall might have an STC of 28-32, but as a case study shows, a decoupled, double-drywall assembly can reach an STC rating between 37 and 39, which is a dramatic improvement.
However, this entire investment in mass, absorption, and decoupling is wasted if the assembly is not meticulously sealed. Acoustic sealant is the critical component that ties the system together. It must be used at every perimeter—floor, ceiling, and corners—and around every penetration, such as electrical outlets and light switches. The cost of the sealant is a small fraction of the total budget, but its role is arguably the most important, as it ensures the integrity of the entire system.
The following budget breakdown provides a realistic roadmap for a high-performance soundproofing project on a single wall.
| Component | Quantity for 12’x8′ Wall | Cost (CAD) | Priority Level |
|---|---|---|---|
| Type X Drywall (5/8″) | 4 sheets | $280 | Priority 1: Mass |
| Resilient Channel | 8 pieces | $200 | Priority 2: Decoupling |
| Rockwool Safe’n’Sound | 3 batts | $180 | Priority 3: Absorption |
| Acoustic Sealant | 6 tubes | $120 | Priority 3: Sealing |
| Putty Pads | 4 pads | $40 | Priority 3: Sealing |
| Screws & Supplies | As needed | $150 | Essential |
| Door Bottom Seal | 1 automatic | $30 | Optional Enhancement |
| Total | $1,000 |
By treating soundproofing as an engineering system where every joint and penetration is a potential point of failure, you can achieve professional-level results. The correct application of non-hardening acoustic sealant is not an optional extra; it is the fundamental practice that ensures your investment in mass and decoupling pays off, providing a quiet and productive space for years to come.